It was a busy month, lots to do and lots to mention! This is therefore the longest newsletter yet! Grab a coffee or beverage of your fancy, sit down comfortably, and read on...
1. Rishworth G-QRP convention
2. November QST review of the Ultimate 3S kit
3. Improved documentation
4. New relay-switched Low Pass Filter PCB improves harmonic attenuation
5. Spanish magazine article: Real-time antenna comparisons using the Ultimate 3
6. Italian Receiver/Polyphase manuals translation by Roberto IZ7VHF
7. Ultimate 3S Buildathon in the South African Radio League boardroom!
8. Dave VE3KCL S-18 balloon circumnavigation, and other balloon/ocean buoy news
9. Divide-by-10000000 in an ATtiny13 chip
10. New "Spare parts" section in QRP Labs shop
11. 5W PA kit update
12. Social media, Feedback, unsubscribing
1. Rishworth G-QRP convention
The highlight of the month, for me, and I am sure many other attendees, was the annual G-QRP Club convention in Rishworth, near Halifax, Yorkshire, UK.
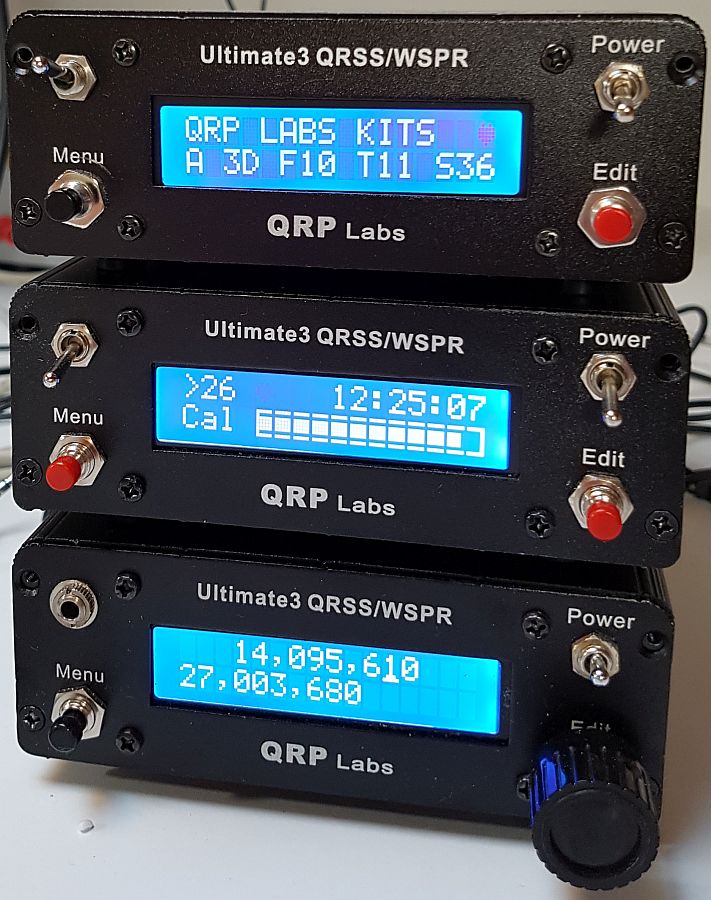
QRP Labs had a stall in the convention hall, and three boxed units to demonstrate some of the kits. There are now 15 kits in the QRP Labs range and these three boxes (pictured, right) managed to display 12 of the 15, in operation! All three were disciplined by the QLG1 GPS receiver kit, sitting right there on the table with its LEDs blinking and of course, having no problem receiving plenty of satellites even though indoors.
TOP: Clock kit, in the enclosure kit. The display contents are customisable so were programmed to scroll through "QRP LABS KITS" and the date/time on the top row, and five screens with a variety of information extracted from the GPS data on the bottom row.
MIDDLE: Ultimate 3S kit in the enclosure kit, with Si5351A Synth kit, Relay-switched LPF kit, and LPF kit modules for 10, 15, 20, 30, 40 and 80m. In other words, it's the Deluxe 6-band U3S set. The U3S was set up to transmit "QRP LABS KITS" in 12 words-per-minute CW on 20m, on three sightly different frequencies, then calibrate.
BOTTOM: VFO kit in the enclosure kit, with Si5351A Synth kit driving Receiver kit (with a short 0.5m piece of antenna wire), with plug-in optional Polyphase network kit for SSB audio output, feeding a small audio amp and loudspeaker. The VFO tuned the receiver on 20m and the CW from the Ultimate3S kit was audible in the speaker. Notice that I put the rotary encoder into the lower right front panel hole usually occupied by the "Edit" button; the rotary encoder has an internal push-button included which performs the same function. The top left switch has been replaced by a 3.5mm mono audio jack socket.
The QRP Labs table was popular, there was always quite a crowd around. By the end of it all I felt quite exhausted! It was wonderful to meet so many QRP Labbers and even to recruit a few new ones! The social evenings either side of the main convention were great too, so nice to catch up with old friends and hear all the news. Thanks and congratulations to the G-QRP club convention organisers for another successful event!

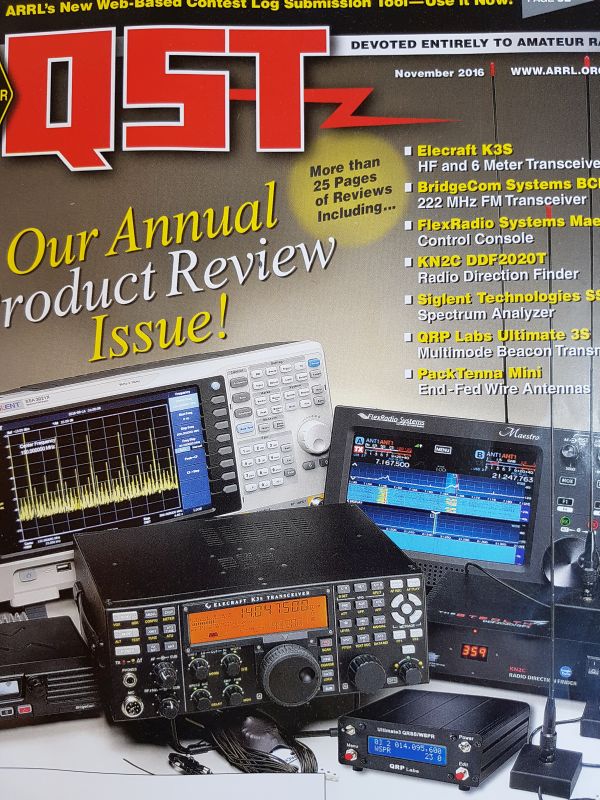
2. November QST review of the Ultimate 3S kit
The QRP Labs Ultimate3S kit, with Relay-switched Filter kit, Low Pass Filter kits, Si5351A Synth kit, QLG1 GPS Receiver kit and Enclosure kit, were reviewed in the ARRL's November QST issue. The 4 page review was written by QST Editor Steve WB8IMY and John KF6I.
The Ultimate 3S appeared on the front cover photograph and list of products reviewed.
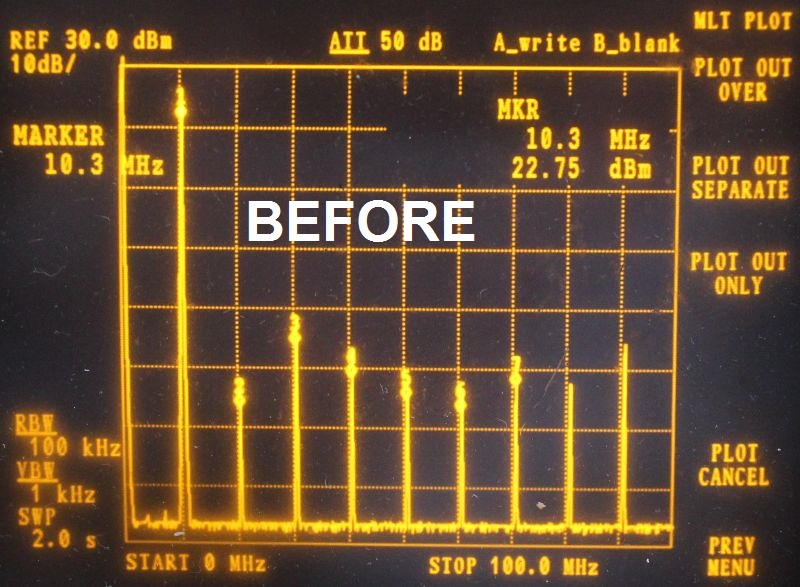
It was a nice review, with a couple of negative points. The reviewers felt the documentation was a little hard to follow, due to the modular nature of the kits and the large number of options available when assembling them. Secondly, measurements indicated that when the 6-band relay switched LPF kit is used, the harmonic suppression does not meet FCC requirements (-43dBc or better) across all bands (an individual filter plugged into the main U3S board only, does meet the requirements).
Following these points we have made improvements to the documentation and re-designed the relay-switched filter PCB, see sections below.
3. Improved documentation
Generally we receive many compliments on the quality of the documentation, most people find the kits easy to assemble and several have even compared the documentation quality to Heathkit manuals of old!
However there is always room for improvement, and as a result of the ARRL QST review we have decided to simplify the documentation where possible. The Ultimate 3S kit, VFO kit and Clock kit all share the same base kit, the QCU PCB (QRP Labs Control Unit). This helps us to keep costs low and maximise the use of the manufactured kit. They shared a single assembly manual, parts of which were inapplicable to the various kits. We have now separated these out into three separate manuals, so that they are now easier to follow. The constructor does not need to carefully decide which section to follow for which of the kits they are assembling.
Additionally, the more advanced construction options will be removed from the assembly manuals. The assembly manuals will therefore cover the base case, the most common assembly which will be the way 95% or more of constructors build the kits. Where there are more advanced options, we will create a separate document (an Application Note) to describe these in detail. This will simplify the manuals for the majority of constructors, but still provide all the flexibility loved by the more advanced kit constructors. Some of this is an ongoing process (there are a lot of documents to get through, and only a fixed number of hours in the day!).
4. New relay-switched Low Pass Filter PCB layout (Rev 5) improves harmonic attenuation
Many people will not be bothered too much about whether they technically meet the -43dBc requirement of the FCC, on such tiny QRP signals of a few hundred milliwatts at most. Others will want to comply and strive for the cleanest possible output from their station. As a result of the ARRL November QST product review, which found that -43dBc was not met across all the bands, we undertook an extensive (and rather time-consuming) investigation.
The investigation first measured the base case kit (in our case, the 6-band Deluxe Ultimate3S set). Bear in mind every LPF will be slightly different of course, due to component and winding tolerances. In our case the worst harmonic was the 5th on the 10m band, measuring -36dBc, indeed some dB short of the FCC's -43dBc requirement. We undertook tests on the LPF module PCB layout, changing the ordering of the filters plugged into the relay board, various types of neutralisation of stray capacitances and inductances, grounding between the PCBs, and where the RF output was connected. A solution was found that does enable the existing kit to meet FCC requirements by the addition of one 56pF capacitor but was not really felt to be a satisfactory solution.
The complete tests and analysis is extensive and you can read it here if you wish: http://www.qrp-labs.com/ultimate3/u3info/harmonics.html. Let's just have the executive summary here! A new relay-switched LPF layout has been designed and manufactured, which retains all the existing components and functionality without change, and without changes to the plug-in LPF modules themselves. The change keeps the highest frequency LPF, which must now always be inserted in the "1" slot, always in-circuit. This further attenuates the unwanted troublesome VHF harmonics.
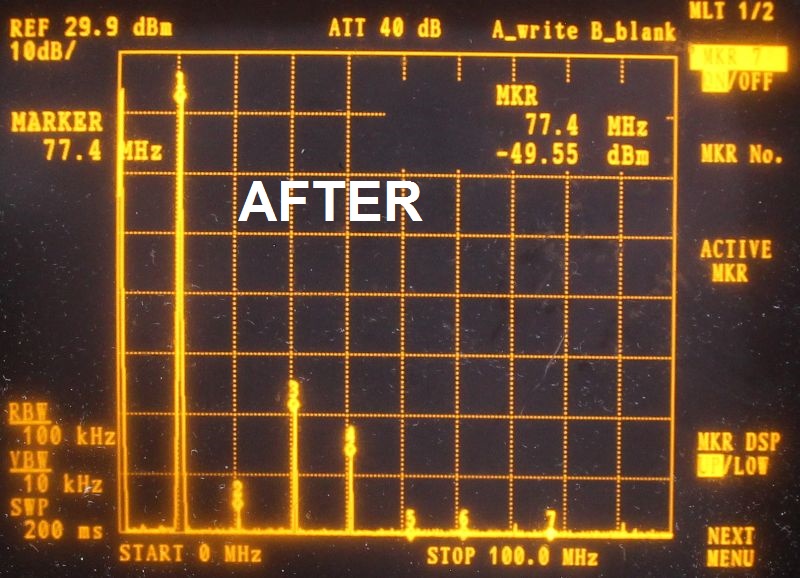
Following this change there was an 11dB improvement in the worst harmonic, to -47dBc, comfortably within the FCC requirement. The average harmonic level was below -60dBc, an improvement of 15dB over the previous board revision. Probably significantly better, but many of the harmonics have now dropped below the noise floor of the spectrum analyser where they can't be measured!
All the existing stock of kits now being shipped has now been upgraded to this new PCB Rev 5 version! Everyone likes a before and after photo... these are for the 30m band:
5. Spanish magazine article: Real-time antenna comparisons using the Ultimate 3
Antonio EA1CDV wrote an article in the Spanish amateur radio magazine Radio Afficionado's November issue. He shows how to use the Ultimate 3 to make automated comparisons between two different antennas.
This is an excellent application of the Ultimate 3 (and 3S) "Aux" feature. This feature has many possible applications to control other relays etc in your more advanced Ultimate 3S system. The 4 bits of the LCD data bus can be set to any value you wish, on the configuration screen for each transmission. It is the number at the bottom right of the screen. During transmission these 4 bits are set to the value you specify. There is a slight complication: these four signals also communicate with the LCD. When the microcontroller writes to the LCD, that interferes very briefly with the values you have set. Therefore an integration circuit is required to smooth out these temporary interruptions.
Pictures, circuit diagrams, and an English translation of Antonio EA1CDV's project are available at this QRP Labs article: http://www.qrp-labs.com/ultimate3/u3info/antcomp.html - it's an interesting and worthwhile read.
6. Italian Receiver/Polyphase manuals translation by Roberto IZ7VHF
Roberto IZ7VHF has kindly contributed Italian translations of the assembly manual for the receiver and polyphase kits. These are available on the receiver page http://www.qrp-labs.com/receiver.html and polyphase page http://www.qrp-labs.com/polyphase.html respectively. THANK YOU Roberto!
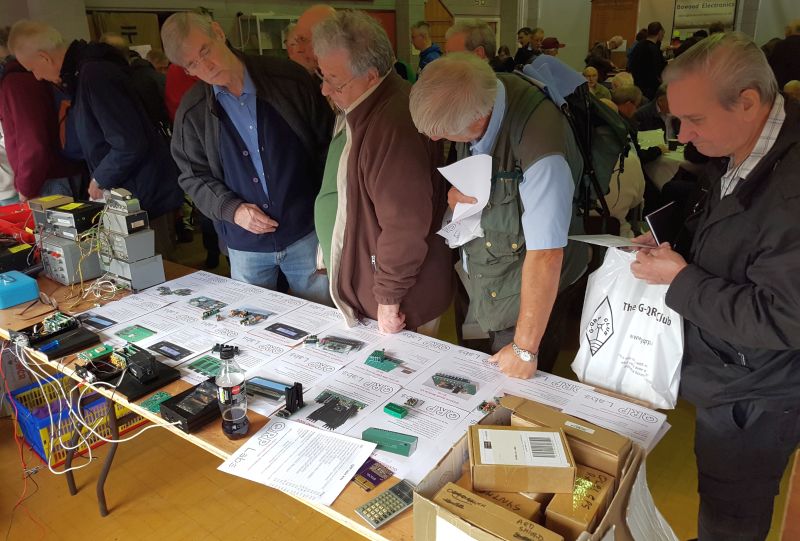
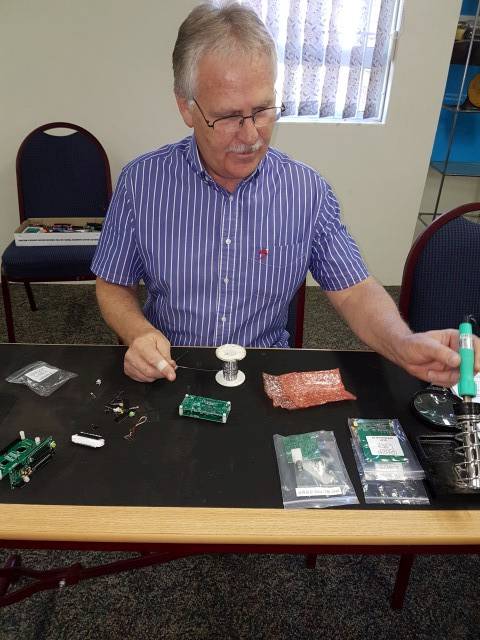
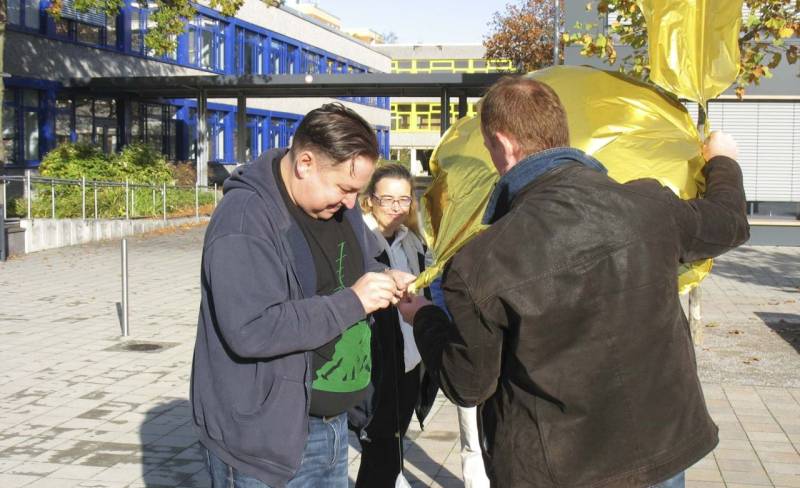
7. Ultimate 3S Buildathon in the South African Radio League boardroom!
The QRP Labs Ultimate 3S kit is a great idea for a club construction night or "buildathon"! It can be put together easily in an hour or two by constructors of all abilities, without requiring any specialised equipment etc., and the results are very rewarding. Leon ZR6LU wrote with details of a buildathon in the South African Radio League SARL) headquarters boardroom!
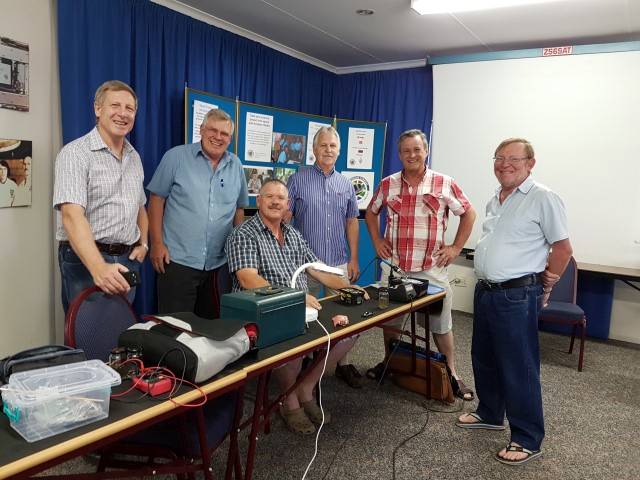 In this group photo (right), participants from lefft to right are:
SARL Chairman Nico van Rensburg ZS6QL
Noel Hammond ZR6DX
Graham Busse ZS6GL (seated)
Emil Bohme ZS6EGB
Leon Uys ZR6LU
Nic van Duffelen ZR6AEZ
The following expanation is from Leon ZR6LU:
The HAMMIES Amatuer Radio Club is a club affiliated to the SARL, more at (http://zs6zu.org.za/about-us). To quote ”The Hammies Amateur Radio Club was the brain child of Noel Hammond (ZR6DX) and Graham Busse (ZS6GL) with the idea to get Graham’s son, Nathan to become an Amateur radio operator.”
The HAMMIES beacon project
Entering this amateur radio hobby as a newbie is a daunting undertaking, and even more so if you are young, and you still have to cope with school work and exams, not to mention a chronic shortage of money. But, for the 27 young Hammies that passed their exams over the last eighteen months, there is good news. The core group of adult supporters who have carried them through the initial stages of writing the Class B RAE, is now actively involved in finding some hardware projects to keep the youngsters’ interest piqued. The objective is very simple: to get them on the air with a simple project, which will increase their participation and doesn’t cost a fortune.
The idea for starting the Hammies with a QRP beacon using a low cost Chinese kit called a Pixie came from Leon Uys ZR6LU. Leon was already very involved in WSPR and QRSS beacons all over the world, and it was just natural for him to extend his knowledge to the Hammies. However, after donating one of his Ultimate 3S beacons from QRP Labs to Nic van Duffelen ZR6AEZ, and seeing what a great opportunity this kit presented, the project took a sudden turn and the group decided to create a few fixed beacons against which the young Hammies can test their new kits.
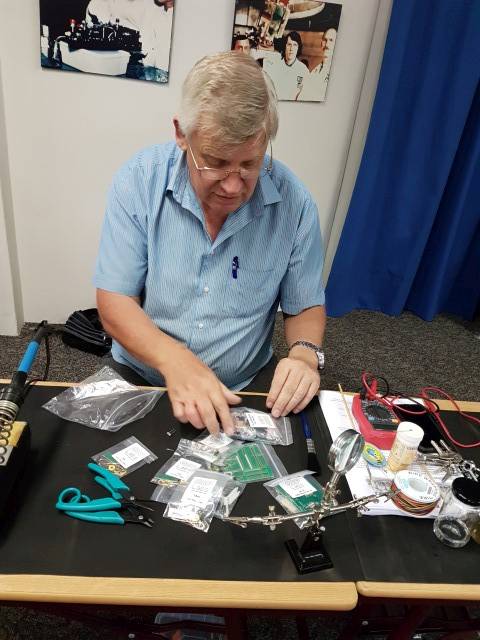
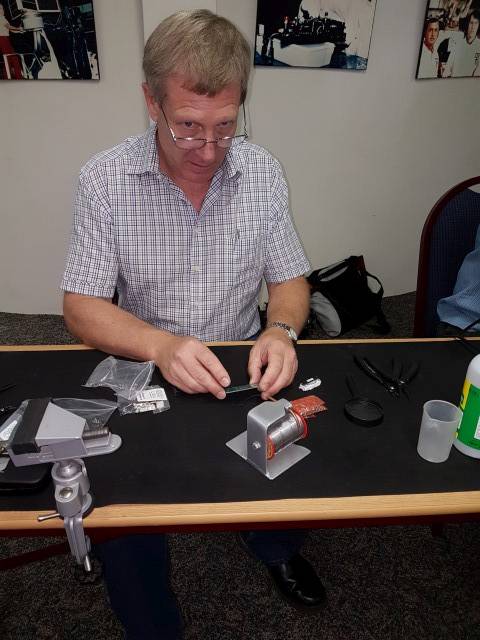
Thus, it happened that six people, namely Leon Uys ZR6LU, Nic van Duffelen ZR6AEZ, Noel Hammond ZR6DX, our Chairman Nico van Rensburg ZS6QL, Graham Busse ZS6GL and Emil Bohme ZS6EGB got together for a “ Build-A-Thon” on Saturday morning, 29 October 2016 at NARC (NARC = National Amateur Radio Centre, the physical headquarters of SARC in Radiokop, Johannesburg) to build their QRP Labs kits. The day was a huge success and two of the kits were already operational when we closed for the day. The others are nearing completion and will be on the air soon.
So keep a listen out on the WSPR and QRSS spots for the guys over the next few months.
Here are some more photographs from the Buildathon. From left to right, Noel ZR6DX, Nico ZS6QL and Emil ZS6EGB.
8. Dave VE3KCL S-18 balloon circumnavigation, and other balloon/ocean buoy news
Ladies and Gentlemen - it doesn't get better than this. Or if it can, then it must be rare. Dave VE3KCL's S18 balloon flight was launched on 07-Oct-2016 from Toronto, Canada. It was an AMAZING flight! It completed a circumnavigation around our Planet Earth on its 22nd day, and continued for another few days across the Atlantic ocean before being brought down by clouds. Congratulations to Dave VE3KCL on this fantastic achievement of good engineering, and also of course the QRP Labs Ultimate 3S firmware which performed flawlessly for 28 days, out of reach of human intervention. The total distance covered was over 46,500km (29,000 miles).
The S18 balloon received a total of 32,477 WSPR reception reports from 630 unique receiving stations! The best DX was VK3FFB at 19,606km (though others probably bettered this, by long path reception). Not bad for well under a hundred milliwatts even in the peak sunshine of the day! You can read the full story, see all the daily reports of the flight, and download the entire data set at http://www.qrp-labs.com/flights/s18
Dave VE3KCL also launched his S19 flight a few days later on 10-Oct-2016 but it was lost a few days later due to a GPS fault.
Meanwhile a number of other QRP Labbers have been busy with Ultimate 3S-based balloon flights too!
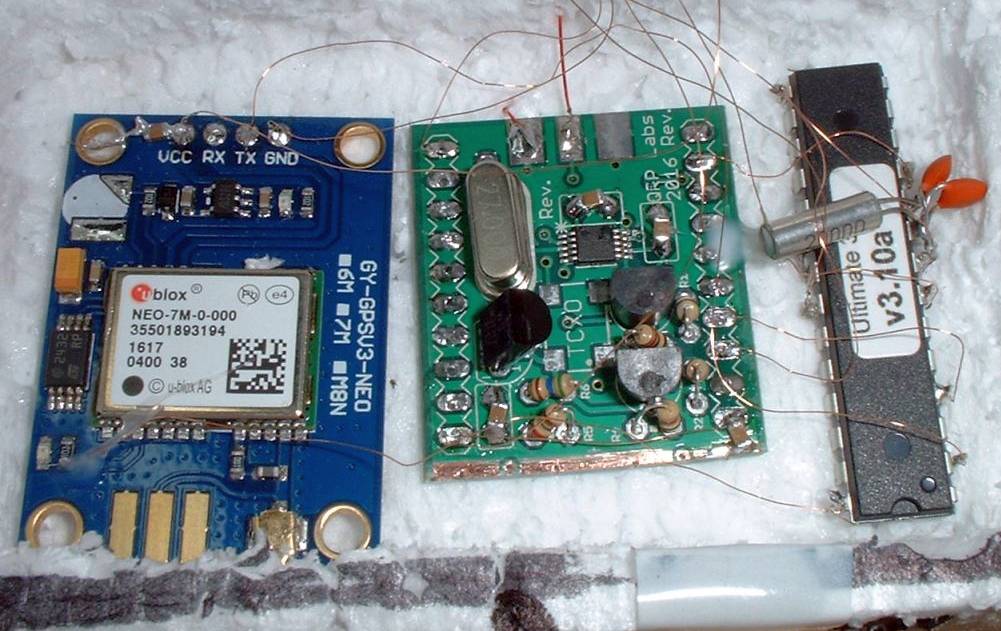
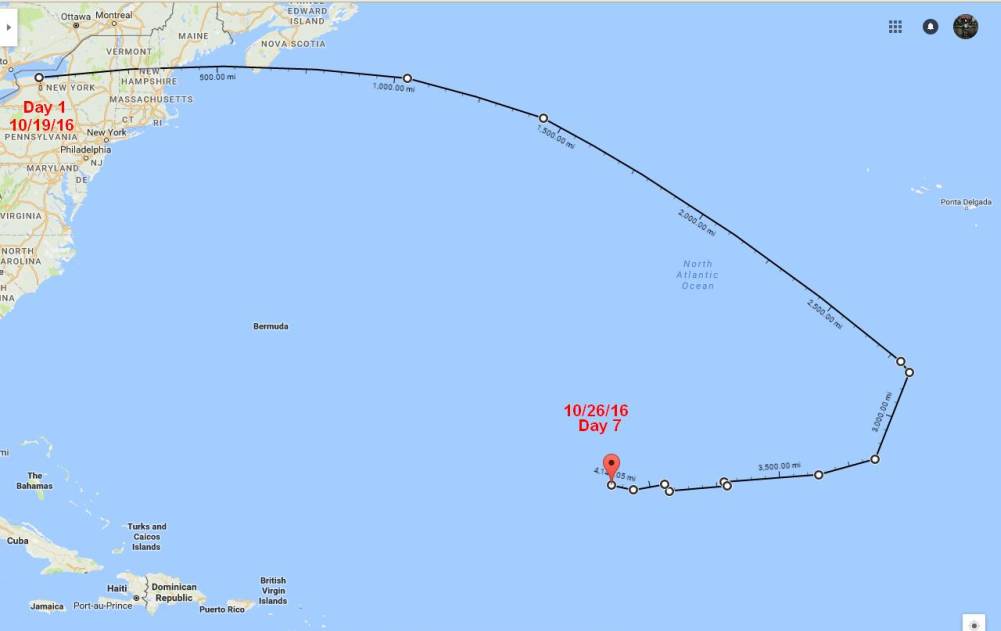
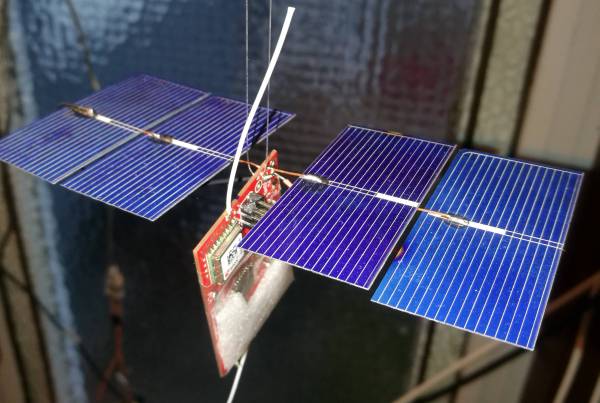
Jim N2NXZ launched his balloon U3S-4 on 19-Oct-2016. He uses plain unmodified Ultimate 3S firmware but he flies only the microcontroller chip, without the rest of the U3S PCB. He first configures a normal Ultimate 3S then removes the chip. He solders the crystal to the chip, and wires up the Si5351A Synth board and GPS. This was Jim's best flight yet and flew for 7 days, out into the North Atlantic. See photos below - note the Si5351A Synth with sawn-off edges to save weight; and the hard-wired v3.10a Ultimate3S firmware chip. More information is on this page http://www.qrp-labs.com/flights/u3s4
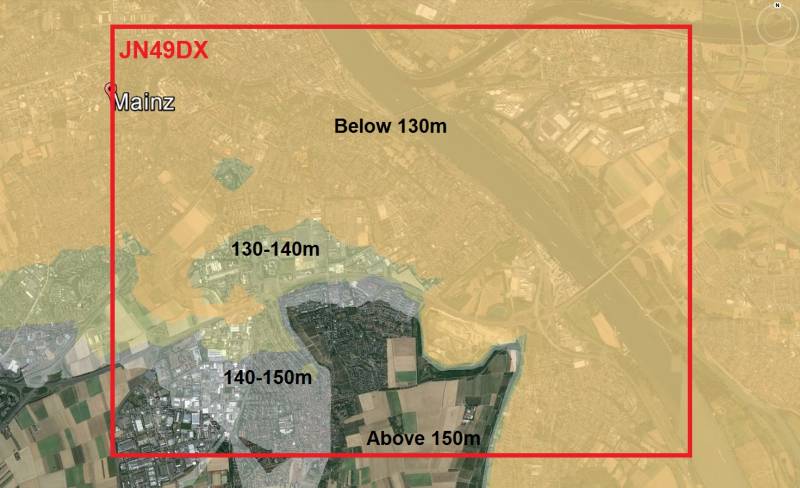
Next up is Dan DL6OW with his second QRP Labs Ultimate 3S flight. Like Dave VE3KCL, Dan installs the firmware onto an Arduino Nano board for weight-saving. He also uses the modified Ultimate 3S firmware as Dave VE3KCL, which sends telemetry over WSPR. Dan had a successful launch and his flight "Stella2" ascended to over 6,000m. But evidently one of the balloons burst and the flight started its descent. The flight duration was about 4 hours and flew 194km, landing in the German town of Mainz.
For the rest of the day, the Stella2 balloon continued transmitting from grid subsquare JN49DX, from the ground! The reported altitude was between 140 and 160m. Stella2 was not received after that first day. Using the reported landing subsquare and altitude, it is possible to eliminate large parts of that subsquare and narrow down the landing area to a hill to the South of Mainz. The satellite image below right shows the JN49DX subsquare (red) in Mainz, and the contours show the altitude, the balloon most probably is at around 150m. So if any of you live in Mainz, have a fun day walking and go out looking for Stella2! More details of the flight are at http://www.qrp-labs.com/flights/stella2
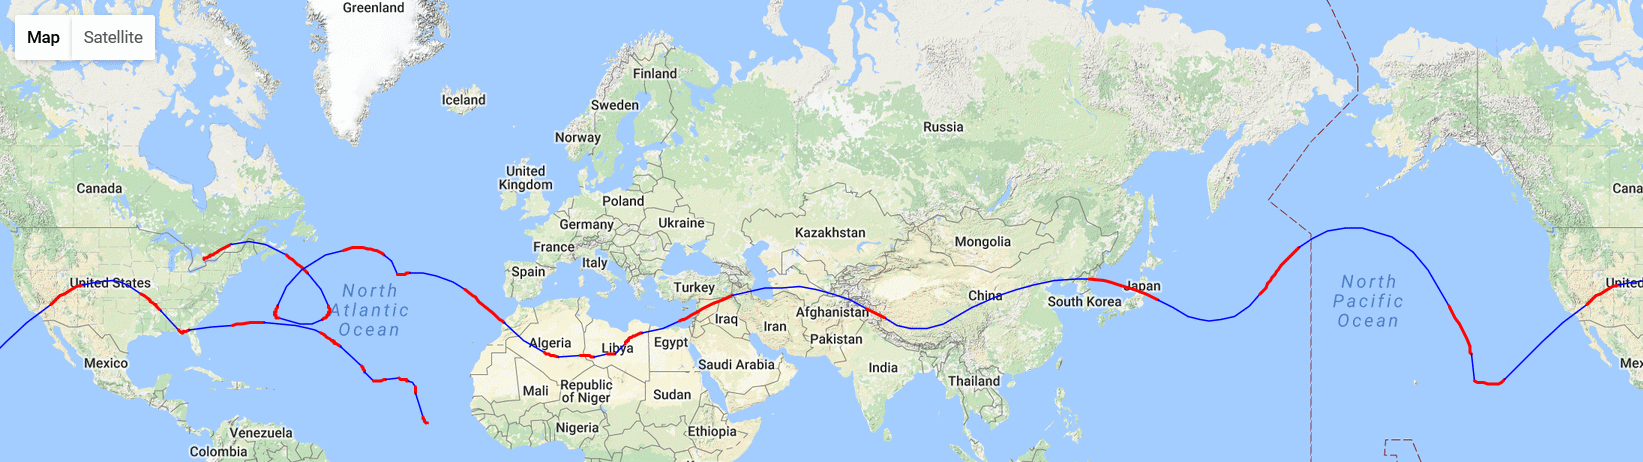
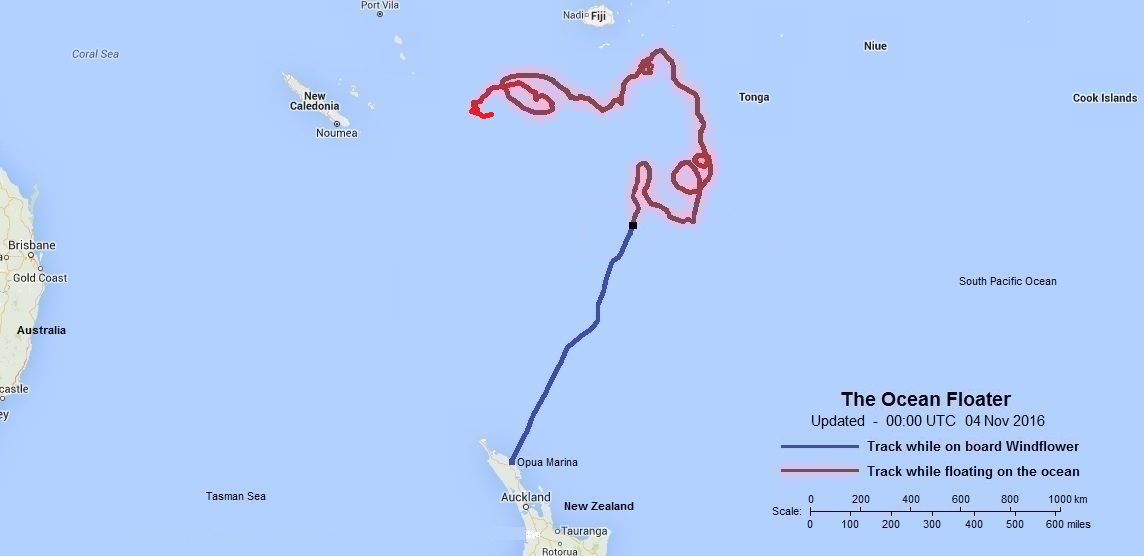
Tracking of a different sort - Bob ZL1RS' ocean floater project continues to survive well at sea, now over 170 says since the launch! See http://www.qsl.net/zl1rs/oceanfloater.html for all the technical details and his daily updates! The map below shows the progress o the floater in the South Pacific ocean, to date. It is a real tribute to Bob ZL1RS' contruction skills, to have something survive for that long without human attention, in such a harsh and corrosive environment!
Finally Mikael SA6BSS launched his own Ultimate 3S (standard firmware) balloon on 30-Oct-2016 from Sweden, transmitting WSPR and JT9 on 20m and 30m. The transmitter was a custom-made PCB he designed himself. The payload weight was 11g including antenna. The balloon was a stan dard helium-filled 95cm qualatex balloon. The balloon was received the following day (31st October) over Turkey, near Istanbul, then headed East along Turkey's North Sea coast. The balloon was again received on 1st November but due to a GPS fault, reported a false location in Canada. Mikael says he intends to work on a custom-made balloon envelope over the winter, to launch a new flight next year aiming to reach 10-11km altitude.
9. Divide-by-10000000 in an ATtiny13 chip
From time to time, the question comes up - can I discipline our QRP Labs equipment (e.g. Ultimate 3S, VFO/SigGen kit, ProgRock kit etc. using my 10MHz Rubidium frequency standard? (etc.). Yes, you can! You need to divide the 10MHz output by 10 million to provide 1 pulse per second (pps) just as the GPS receiver would provide. There was a discussion on the QRP Labs YahooGroups forum about using some PIC code to do this. QRP Labs has some code developed some years ago that we used for this (and similar) purposes from time to time. So there's now an article on the QRP Labs website providing this code for anyone who wants to use it.
The code runs on a tiny inexpensive 8-pin AVR, the ATtiny13. It has 10MHz input and 1pps output, and it also includes a "Sync" input that allows you to synchronise the start of the 1pps pulse to an external source if you wish. See http://www.qrp-labs.com/ultimate3/u3info/divider.html for details!
10. New "Spare parts" section in QRP Labs shop
Another question that often comes up, is people wanting to buy some spare parts individually. The QRP Labs shop only lists the complete kit packages and the shipment office didn't until now have stock of individual components. But, there's clearly a need for these. Most people just build their kits the normal way. But some go further and do something extra or unusual with their kits, or wish to install more things in the Aluminium case kit - with 16cm depth there is spare room when the Ultimate 3S is installed inside! In response to this need we have created a "SPARE PARTS" section of the shop. The following items are currently stocked there:
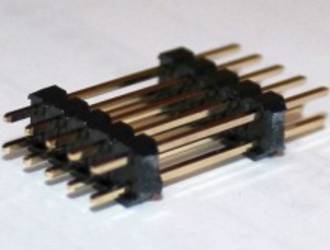
- 2 x 5-pin "tall header" that is used for connecting the Ultimate 3S PCB to the relay-switched filter PCB
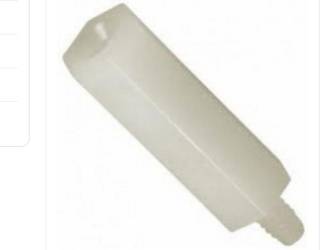
- Pack of 4 of the 25mm nylon hex spacers - could be useful for fixing extra boards onto kit the stack, for example the receiver kit
- Pack of 4 of the 6mm M3 nylon screws used to bolt the boards together
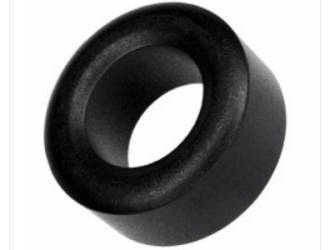
- FT37-43 toroid as used in the Ultimate 3S PA section
- FT50-43 toroid as used in the forthcoming 5W PA kit
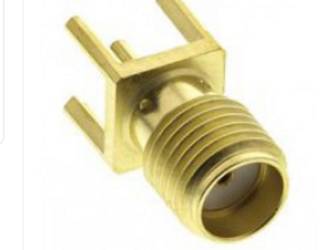
- SMA socket, suitable for use in the relay-switched filter kit, the receiver kit, or the QLG1 GPS receiver kit
- TX2/5V DPDT relay, 5V 28mA coil, as used in the relay-switched filter kit
- "QCU" QRP Labs control unit, the PCB, components and LCD assembly at the heart of the Ultimate 3S kit, the VFO/SigGen kit, and the Clock kit
The new spare parts section of the shop is here: http://shop.qrp-labs.com/SPAREPARTS

The firmware chips (for upgrade or replacement) continue to be available in the firmware category.
11. 5W PA kit update
With all the other things that have been going on the last month, the 5W PA kit is still not finished! A few prototype boards were manufactured, which we hope are the LAST and FINAL version of the PCB. They have been assembled and are awaiting final testing and performance measurements. Apologies for the delay, I know quite a few people are waiting for this kit.
12. Social media, Feedback, unsubscribing
Social media: QRP Labs has the following presence on social media. If you use these social media then please join or follow QRP Labs! Announcements such as new products, balloon launches, etc., will be made first in these media!
1) QRP Labs YahooGroups forum, https://groups.yahoo.com/neo/groups/QRPLabs/info for discussion and support on all QRP Labs products
2) QRP Labs Facebook page https://www.facebook.com/QRPlabs/
3) QRP Labs is @qrplabs on Twitter https://twitter.com/qrplabs
Feedback: As always, please do write with any comments, ideas, criticism, feedback of any kind!
Unsubscribing: If you want to unsubscribe from this monthly newsletter, then either log in to your QRP Labs shop account and un-check your newsletter preference, OR, email and we'll take care of it.